Base de Conhecimento
-
Installation Steps
Installation Steps
Step 1. Copy contents of "upload" folder to WHMCS root folder.
Step 2. Activate "Elementor Sync" addon module
WHMCS Admin -> Setup -> Addon Modules -> Elementor Sync-> Activate. Use Access Control checkboxes to provide admin access to module.
Step 3. Input license key and enter WordPress URL where Elementor Pro is installed.
WHMCS Admin -> Addons -> Elementor Sync. Save when complete.
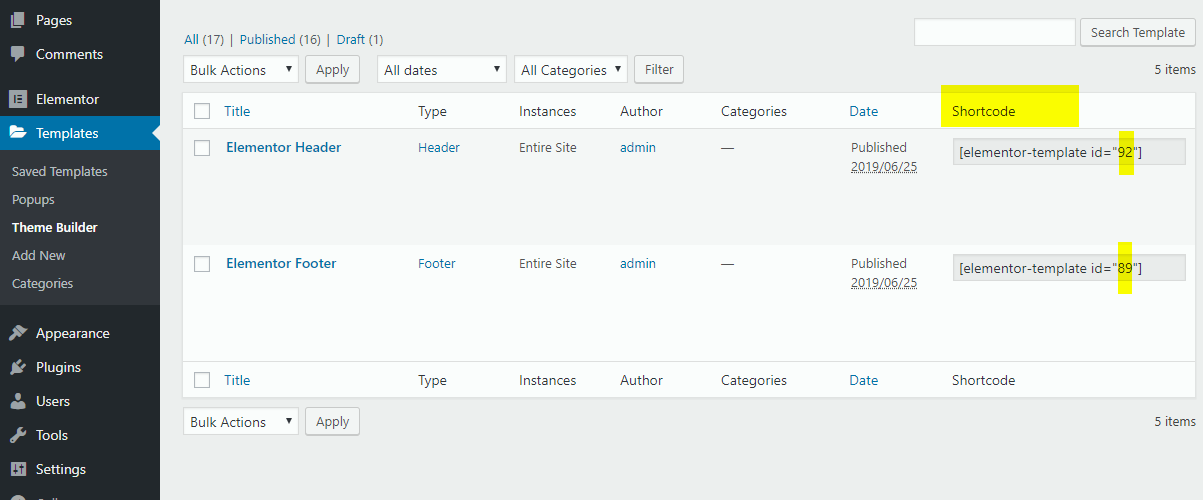
Step 4. Input template ID (digits only) information for header and footer.
Please see screenshot below for ID location.

Template ID for header and footer is available via WordPress Dashboard > >Templates > Theme Builder
Sync and test.
WHMCS Heading is an optional area below header. It can contain breadcrumbs and page title. It can be a "section" template in elementor template library.
Text words "pagetitle" and "breadcrumbs" will be replaced with WHMCS page title and WHMCS breadcrumbs in WHMCS.
